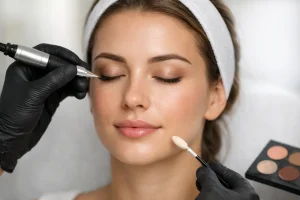
Fresh microblading can look beautifully defined on the day of your appointment, then appear darker, softer, or even slightly uneven as your skin begins to repair. That change can feel surprising, especially when you have invested in a custom brow shape designed for your face. Following the right microblading healing aftercare steps helps protect your pigment, supports clean healing, and gives your brows the best opportunity to settle into a soft, natural-looking result.
Your artist’s personal instructions should always come first. Your skin type, technique, lifestyle, medications, and the condition of your skin can affect the right aftercare plan for you. Think of the guidance below as a clear roadmap for what normally happens and how to care for your investment with confidence.
The First 24 Hours Set the Tone
Your brows are a fresh cosmetic tattoo and should be treated with care from the moment you leave your appointment. It is normal to see a little clear fluid, mild redness, or tenderness shortly afterward. The pigment will also look more saturated than the healed result. That initial boldness is temporary.
Follow your artist’s instructions for gentle blotting during the first day. If you have been told to blot, use a clean tissue or sterile gauze with a light touch. Do not rub, press hard, or repeatedly inspect the area with your fingers. Hands carry bacteria, and unnecessary contact can irritate healing skin.
Keep your face clean, but avoid directing a strong shower stream onto your brows. When washing around them, use clean hands and take your time. Pat the surrounding skin dry rather than dragging a towel across the brow area.
Microblading Healing Aftercare Steps for Days 2 Through 10
The next week is when patience matters most. Your brows may look darker for several days, then begin to feel dry or tight. Light flaking and scabbing are common parts of the process. The goal is not to speed this phase up. The goal is to let it happen without disrupting the pigment underneath.
Clean only as instructed
Some clients are instructed to use a gentle cleansing method after the first day, while others may be advised to keep the area dry for a specific period. This is why personalized aftercare matters. Use only the cleanser, technique, and frequency recommended by your artist.
Avoid exfoliating cleansers, acids, retinoids, benzoyl peroxide, and harsh toners near the brows. Even products you use regularly can be too active for freshly treated skin. Keep skincare focused on the rest of the face until your artist confirms it is safe to resume your usual routine around the brow area.
Apply ointment sparingly, if prescribed
If your aftercare plan includes an ointment, use the smallest amount needed. A very thin layer is usually the goal, not a thick coating. Too much product can trap moisture, interfere with the healing environment, and encourage premature pigment loss.
Use a clean cotton swab or freshly washed hands if your artist has approved fingertip application. Never double-dip into a product after it has touched your skin. If no ointment was recommended, do not add one on your own. More product is not always better.
Let flakes release naturally
This is the rule clients remember because it makes a real difference: do not pick, peel, scratch, or pull at flakes. A flake may look like it contains pigment, and it often does. Removing it early can pull pigment from the skin before it has had time to stabilize.
Brows can look patchy during this stage. That does not automatically mean the treatment failed or that your brows will stay uneven. Healing happens in layers, and the color can appear to fade dramatically before it returns as the skin finishes repairing.
What to Avoid While Your Brows Heal
For roughly 7 to 14 days, or for the exact period your artist recommends, protect your brows from activities and products that add moisture, heat, friction, or bacteria. This short pause helps preserve the detail and definition created during your appointment.
Avoid these common healing disruptors:
- Swimming pools, hot tubs, saunas, steam rooms, and long hot showers
- Intense workouts that cause heavy sweating around the forehead
- Direct sun exposure, tanning beds, and self-tanner near the brows
- Makeup, brow pencils, powders, and concealer directly on the treated area
- Facials, chemical peels, dermaplaning, microneedling, and laser treatments near the brows
- Sleeping face-down or allowing your pillowcase to rub against the brow area
If you exercise regularly, schedule your treatment with your routine in mind. A gentle walk may be fine for many clients, but a heated yoga class, hard run, or high-intensity session can create enough sweat and friction to complicate early healing. It depends on your individual aftercare plan, so ask before returning to your normal fitness schedule.
Sun protection also matters after the initial healing period. Once your artist says your brows are fully healed, apply sunscreen around the area as part of your daily routine. Sun exposure can contribute to premature fading over time.
Understand the Healing Timeline Before You Judge the Color
Most clients experience several visible stages. During days one through three, brows often appear darker and sharper than expected. Around days four through ten, light scabbing or flaking may begin. As flakes come away on their own, the color can look lighter, grayish, or as though it has disappeared.
This “ghosting” stage can be unsettling, but it is often temporary. Over the following weeks, color gradually resurfaces as the skin matures. Final healing commonly takes four to six weeks, although skin type, immune response, age, sun exposure, and aftercare habits can influence the timeline.
A perfect, fully healed result is rarely meant to be assessed in the first week. Microblading is typically a two-appointment process because the touch-up allows your artist to evaluate retention, refine areas that healed lighter, and make subtle adjustments. This is where personalized artistry continues after the initial procedure.
Know When to Contact Your Artist or a Medical Professional
Mild redness, tenderness, dryness, and flaking can be expected. Significant pain, worsening swelling, spreading redness, heat in the area, yellow or green discharge, fever, or a rash that concerns you are not symptoms to ignore. Contact your artist promptly for guidance, and seek medical care when appropriate.
It is also wise to reach out if you are unsure whether a product is safe to use, if you accidentally got your brows very wet, or if a scab came off early. A quick question is better than guessing. A professional artist wants you to feel informed and supported throughout the process.
Protect Your Long-Term Brow Investment
Once healed, your brows should feel like your own, only more balanced and polished. The way they fade over time depends on factors such as skin type, skincare ingredients, sun exposure, and how often you receive exfoliating or resurfacing treatments. Oily skin may soften pigment faster, while dry skin may retain crisp detail differently. Neither is wrong, but each may influence maintenance timing.
Be transparent about your skincare and aesthetic treatment plans at every appointment. Retinol, prescription acne products, chemical peels, IPL, laser services, and some facials may need to be paused before and after brow treatments. Your artist can help coordinate a schedule that respects both your skin goals and your brow results.
At Brows by VJ, aftercare is treated as part of the artistry, not an afterthought. Give your brows the quiet healing time they deserve, follow your personalized instructions closely, and allow the final result to reveal itself gradually. The most beautiful healed brows are built with precision in the studio and protected with care at home.